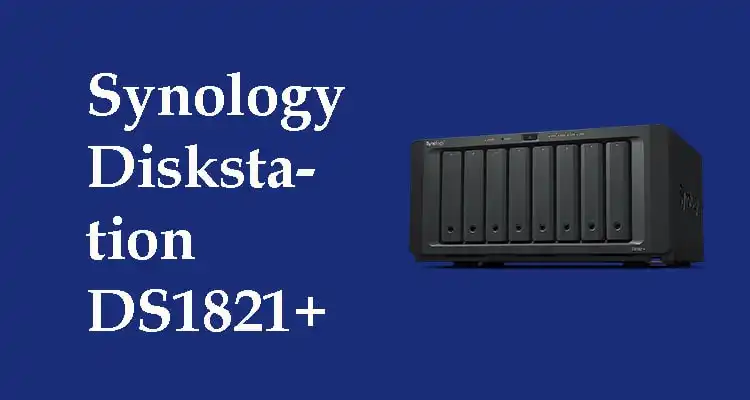
The Synology Diskstation DS1821+ is the practical and most innovative solution that is specially designed to look after the data and protect them. Well, the Synology diskstation is effective to store your important file and documents in a protected space. Also, it has the most useful features and solutions to your problems. Moreover, the Synology 8 bay NAS has AQMD Ryzen CPU and two M.2 2280 slots for NVMe Cache. Thus, this all helps to drive the device to its smooth and solid performance. Most business owners prefer to use the Synology Diskstation DS1821+ as it helps to expand the capacity of the storage device and also helps to count to eighteen for every single use.
Synology Diskstation is a powerful and strong NAS desktop device that offers every storage usage such as SMB to be likely into a very fair and rare price. Thus, DS1821+ offers a new range of NAS storage appliances and indefinite upgrades. The server grade of the Synology ensures business-class consistency and reliability.
Before you Install Synology Diskstation DS1821+
Before you start doing the installation of the Synology Diskstation DS1821+ storage device, you need to carefully read the instructions that are written on the package. Then, check the package and also verify its physical components. It is because you have to verify that you are receiving every piece along with the Diskstation. In case, if you find any piece missing or damaged then immediately ask your service provider. However, you need to ensure to avoid harming yourself and the Synology NAS.
- The Main unit x 1
- An AC power cord x 1
- The RJ-45 LAN cable x 2
- The Hard drive tray key x 2
- The Screws for 2.5″ drives x 36
So these are the components that are likely to get into the package of the Synology NAS diskstation. Make sure that none of them will be broken or lost from the list.
Hardware Specification of the Synology NAS Diskstation DS1821+
Here is the complete information about the hardware specification, check it now.
- Compatible Drive Type – • 3.5” / 2.5” SATA x 8 • M.2 2280 NVMe SSD x 2
- Maximum Internal Raw Capacity – • 128TB (8 x 16TB HDD) • 288 TB with 2 x DX517 (expansion unit)
- External Port – • USB 3.2 Gen 1 x 4 • eSATA x 2
- LAN Port – 1GbE (RJ-45) x 4
- PCIe Slot – Gen3 x8 slot (x4 link) x 1
- Size (H x W x D) (mm) – 166 x 343 x 243
- Weight (kg) – 6.0
- Supported Client – • Windows 7 onwards • macOS 10.12 onwards
- File System – • Internal: Btrfs, ext4 • External: Btrfs, ext4, ext3, FAT32, NTFS, HFS+, exFAT
- Supported RAID Type – • Basic • JBOD • RAID 0 • RAID 1 • RAID 5 • RAID 6 • RAID 10
- Agency Certification – • FCC Class B • CE Class B • BSMI Class B • EAC • VCCI • CCC • RCM • RoHS Compliant
- HDD Hibernation – Yes
- Scheduled Power – On/Off Yes
- Wake on LAN – Yes
- Environment Requirement – • Line voltage: 100 V to 240 V AC • Frequency: 50/60 Hz • Operating Temperature: 32 to 104˚F (0 to 40˚C) Storage Temperature: -5 to 140˚F (-20 to 60˚C) • Relative Humidity: 5% to 95% RH
This is the hardware specification of the Synology NAS diskstation storage device. Moreover, the storage device also supports multiple languages such as English, Deutsch, Italiano, Netherlands, Magyar, and so on.
Synology Diskstation DS1821+ 8-Bay NAS Installation
Now let’s begin the hardware setup of the Synology NAS diskstation.
- In the very first step, you have to install the drives to the lower part of the hard drive tray as it will help to unlock all the handles.
- Next, steadily pull out the hard drives so that you can easily remove all the hard drives one by one.
- After that, you have to load all the hard drives into the drive trays. For that, you have to remove the panels first and then shift them into a safe place. After that, place the hard drive into the drive trays on the rectangular line. Then safely turn the trays upside-down and tighten by using the screws so as to secure the hard drive trays.
- Thereafter, simply insert the empty tray into the loaded hard drive tray and slowly push it into its actual position so that you can adjust the handle.
- After that, push the handle into the front panel of the device and it will help to secure the hard drive tray to its read position.
- After doing that, you have to insert the tray key into the hard drive key so that it can twist anti-clockwise and it will also help you to lock the tray handles. Then you can simply remove the key.
- Repeat the same step so as to install another hard drive tray and the drive numbers are already mentioned in its tray. You can check and arrange them simply and smartly.
So this is how you can easily install the Synology NAS diskstation. You can easily log in and set up using find.synology web address.
Synology Diskstation DS1821+ 8-Bay Setup
Follow the instructions carefully to install the diskstation NAS storage device appropriately.
- You can simply use the LAN cable to connect the Synology NAS router, hub, or switches.
- After that, you have to connect the end of the AC power cord of the Synology NAS diskstation to the AC port. Then simply connect the other end of the port to the electrical outlet.
- Thereafter, you need to press the power button to power on the NAS storage device.
This is it! The Synology NAS Diskstation has been successfully set up and now you can turn it on from the network of the desktop computer.
The List of the modes and the LED Indicators of the system
Check out here the different modes of the system and their LED indications. This will help you to identify the status of the device.
- When the storage device system mode is powering on – the blinking Blue means the device is powering on and the green and orange status shows that the device is powered off.
- The shutting down system mode – when it is blinking blue LED, it means it is powering off and when the status is green, it means it is in a static mode and orange status means it is off.
- When the DSM is not ready – it will start blinking green and when it is status it shows the blue LED and the orange LED means it is off.
- When the DSM is ready to use – the blue and the green LED will be static.
- During hibernation, the blue power LED light will be static and others will be powered off.
These are the LED indications of the system that you need to understand. However, It is basic knowledge. To know your product, you have to know more about its settings and different modes.
Review
The Synology Diskstation DS1821+ NAS storage device provides a simple and traditional solution to store the file and a lot more improved features. However, it is a multi-featured storage device that has convenient functions to operate and configure. It is perfect for small businesses or house owners and it will not affect the storage capacity. Moreover, it is a great investment for its users and it can be anyone. The NAS or the network-attached storage device is the right or might be a challenging solution that protects your file for a long time and provides them residual storage. Moreover, the entire device keeps your data refreshed for over two years. The Synology Diskstation DS1821+ 8 bay NAS model uses an Intel CPU and the rarest rage of the appliances so that the users can use it smoothly.