The WD My Cloud EX2 Ultra provides high performance with a 1.3 GHz dual-core processor which is used for lag-free and seamless streaming. Moreover, you get 1 GB of DDR3 memory to complete multitask work with ease and perfection. However, the WD My Cloud EX2 Ultra NAS storage device offers you centralized network storage. This means you can access the storage device anywhere in the world and anytime it doesn’t matter. In addition to this, you get the advantage of an automatic file syncing function that can work with almost every computer device.
Besides, the WD My Cloud EX2 Ultra NAS storage device helps to simplify the folder and file sharing access and simple system management backup function. That is mostly used for personalized backup storage. Also, the setup of the NAS storage is so easy that it can be easily found on the network and installed over the web GUI, the most important thing. About the setup is that it can be completed without any tool operations.
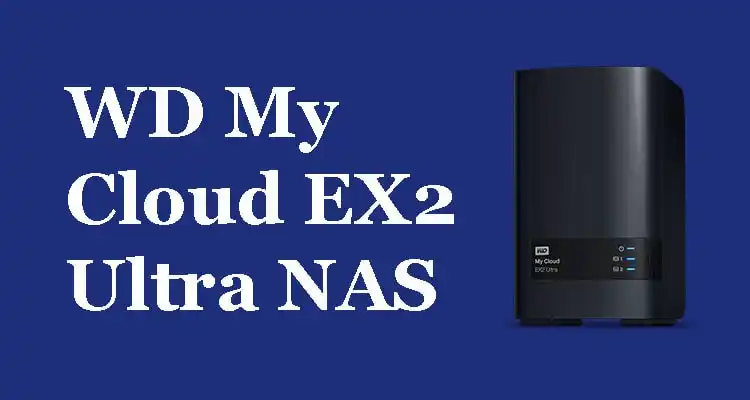
Effective Features of the WD My Cloud EX2 Ultra NAS Storage device
So here are some effective and newly innovated features of the WD My Cloud EX2 Ultra NAS storage device. Thus, the listed features of the WD My Cloud EX2 Ultra NAS device help you to know more about the product details. If you actually want to get the information about any storage device then first you have to check its features. That actually describes the qualities of the product.
- The first excellent feature of the WD My Cloud EX2 Ultra is that it is organized. And, provides backup with a high volume of content that comes from various computers, tablets, and smartphone devices. With the help of its useful cloud technology, you can own a private space with a private network without purchasing an extra amount on its subscription.
- Also, if you have the NAS storage device then you can simply save, stream and access all your media contents. Anywhere in the world with an internet connection to your MyCloud.com web access or My Cloud OS 5 Mobile app.
More Features
- The amazing thing about the NAS storage device is that the setup and the installation of this device is so easy and effective and can also be found on a network easily. Thus, you can install the whole setup from the web GUI which makes the setup process intuitive and simple that is completely tool-less and offers tray-less drive bays. So that you are able to add to remove the existing media hard drives in a moment of a matter.
- However, the WD My Cloud EX2 Ultra is totally equipped with 256 AES volume encryption that helps to secure the stored files throughout the entire network and it doesn’t matter whether you are using a Mac or a PC your stored media content will be protected with WD My Cloud EX2 Ultra NAS storage device.
Well, the safety features of the WD My Cloud EX2 Ultra NAS storage device don’t end here. You can check online and get a WD My Cloud Ultra storage device for yourself. So that you could be able to experience the real factors of the storage device.
Check the Packaged Items:
Before the installation of the NAS storage device, you should check all the items that will be received along with the WD My Cloud EX2 Ultra NAS storage service. This is important to know what you will receive with the device and what you have to spend money on purchasing the items Check the list.
- The first thing is WD My Cloud EX2 Ultra Cloud storage device
- An Ethernet cable
- The AC power adapter
- A user manual guide
- The Assembly kit for all the driverless models.
These are the things that you get in a packaged box of the cloud storage device.
- An Internet Explorer
- Firefox 30 should also support MAC and Windows computers
- Safari 6.0 should support MAC and Windows computers
- Google Chrome 31 should support MAC and Windows computers
- A wireless router or a Gigabit switch of any local network should help to maximize the performance of the internet connection
- A broadband internet connection is required during the initial setup and the WD My Cloud EX2 Ultra software downloads to get remote access and the smartphone app
So these are the list of the things that you might need to purchase for the setup of the WD My Cloud EX2 Ultra private cloud storage device.
Pre-Installation Instructions
Well, you have to believe that this NAS storage device helps to keep your media things safe in a single place with high performance and outstanding cloud technology. However, you can safely access the smart and seamlessly stream the NAS storage device worldwide with a reliable internet connection.
So before you begin the installation of the Ultra private cloud storage device you must follow the instructions that are below-mentioned.
Points to remind
First of all, you have to find an ideal location for the cloud storage device to obtain its maximum efficiency. Make sure you have to position the device in the following places:
- It should be a stable surface free from vibration
- It should be near a grounded electrical wall outlet
- It should be placed in a clean and dust-free area
- Find a well-ventilated place that is free from blocking and covering the opening and the closing of the slots.
- Also, it should be away from the source of heat
- Stay away from electromagnetic devices such as ACs, televisions, and radio receivers.
These are the list of the places where you can choose to place and where you should keep it away. Though, it is important to handle an electronic product with a lot of care during unpacking and installation. So follow the listed steps to avoid external and internal damage to the product.
- Make sure that you don’t have to jolt or drop the device
- You should not use this product as a USB portable device
- You should not move this device when it is turned on
- Also, you should not remove both the data drives as it will cause injuries to become unresponsive.
These are the list of the pre-installation precautions that you must follow to avoid any damage to the device and so as to you. For more safety instructions you can read the WD My Cloud EX2 Ultra manual.
WD My Cloud EX2 Ultra Installation Steps
So here are the installation steps for installing the drives into WD My Cloud EX2 Ultra private cloud storage device. Thus, the installation of this NAS storage device can be completed without using the drives so check out the steps to install the device without drives.
- First, you must press the power button on the top of the device.
- After that, you have to remove the brackets that are used to hold the drive place.
- Next step, you have to use a screwdriver to attach the tab on the side hole of the drive which may be on the right side of the green board facing you.
- Afterward, you should insert screws on the different side of the hole that is facing another side of the hole.
- After that, attach the labels to the top of the drive and then on the right side when the unit is looking down at the top of the unit.
- Thus, you can simply use the different numbers on the bottom side of the cross label.
- You have to connect the bottom of the drive when you are looking at the top of the unit facing the main side of the front panel.
- However, you have to gently slip the drive into the slot and ensure that the tab is sticking at the bottom of the unit.
- Now repeat the first three steps and screw the bracket over the drives and gently close the door until it locks into its original place.
- Lastly, continue to physically connect the WD My Cloud EX2 Ultra storage device to a home and an office network.
More Steps
- For that, you have to use the Ethernet cable. Which is provided to you and simply connect one end of the cable to another end of the Ethernet port located on the back of the device.
- Next, you have to connect one end of the Ethernet cable directly to the network switch or the port of the wireless router.
- After that, connect one end of the power adapter to the power supply socket and to the bottom of the storage device
- Later on, plug one end of the power adapter into a wall outlet. This will power up the WD My Cloud EX2 Ultra automatic backup.
- Now check the power LED of the device and wait until it turns solid blue.
This is it… The installation of the WD My Cloud EX2 Ultra device is successfully completed now.
WD My Cloud EX2 Ultra Setup using online software
Well, the setup of the ultra cloud storage device by using online software. However, the defined setup steps will necessarily help you to connect the device to your office and home network. Try out the following steps to install and run the online software app on your mobile phone. But first, you have to connect the storage device to a secure internet connection, and then…
- Primarily, open a secure internet browser on a PC or a laptop and enter http //mycloud.com/setup to access the welcome page of the device.
- After that, when you enter into a welcome page then click on the get started option so as to begin the setup process.
- Thus, the setup software will start searching for the cloud device.
- When your NAS storage is found then it will start displaying your device on a computer screen. The WD My Cloud EX2 Ultra default
- IP address, Mac address.
- Now you have to follow the on-screen instructions to complete the setup by installing the Western Digital syncing process.
- When the setup of the software is completed and the WD syncing also has been installed into a device. Then the windows device will start appealing to some of the common folders on your computer device.
- Simply, you need to select those folders on your computer and select which you want to sync the folder on your computer with the
- MyCloud device and click on the Next button.
- After that, when the syncing process of the device is completed then close and exit the setup windows.
Thus, the setup of the WD My Cloud EX2 Ultra storage device is successfully completed.
Configuration of the WD My Cloud EX2 Ultra cloud access for the admin user
After the setup, you have to enter into the WD My Cloud EX2 Ultra login section to complete the configuration for a user. These steps will help you to enable cloud storage for the WD My Cloud EX2 Ultra device. It also provide you the access capability as a user admin.
- First of all, you have to click on the navigation bar and click on the cloud icon from the menu.
- After that, select the user ID which you like to configure for your WD My Cloud EX2 Ultra cloud access
- Now go to the MyCloud login and enter the user name into the admin username bar. Then click to add or change the email address details.
- You have to click on the same bar if you want to add or update the WD My Cloud EX2 Ultra default password
- Now enter the correct credential and the email address for the confirmation of you as an admin user.
- On the same email address, the device will send the confirmation instructions and information during the setting up of the default password and the username for cloud access.
- Lastly, you have to click and save the details.
Congratulations on the configuration settings of the WD My Cloud EX2 Ultra storage device.
WD My Cloud EX2 Ultra Review
The WD My Cloud EX2 Ultra private cloud storage device provides a simple plug-and-play connection. That makes the setup easier and installation more effective. However, you can use its robust data protection technology which is used to protect and secure the most important data. Its automatic software backs up everything from the operating system. Also used for the setting up of the individual file by supporting both Mac and PC machines. However, it also syncs all the content to any computer device and is smartly upgraded for smooth and seamless streaming.
The WD My Cloud EX2 Ultra price is $94.76 along with shipping and import fees. You can also check on different online sites to get the product/. Also, the WD My Cloud EX2 Ultra customer. care number is available 24×7 to help and support their customers. You can ask them if you are stuck with any issues. Otherwise, it is a great deal and highly recommended to everyone.